A visit from my youngest son finally gave me the push I needed to do a write-up on ill-fitting shirts and a fairly easy remedy for it. All you need is either some very basic skills with a sewing machine, a little time and patience, and a shirt that is too large of body.
There are a few measurements a shirt should have in relation to your body if you’re to say it’s a good fit. The three most important are:
- The width of the shoulder seam matches the width of your shoulder
- The length of the arms matches the length of your arms
- The size of the body of the shirt is a good fit for your body, this means it’s neither tight nor overly baggy
Now, the first two are easily judged by just looking at yourself in the mirror whilst wearing the shirt. The third is a little trickier to judge, as can be witnessed by looking around at the shirt-wearers that can be spotted. Too tight and it’s uncomfortable to wear and looks terrible. Too loose and it’s comfortable, but again doesn’t look very good.
So, being of an engineering mind, is there a proper way to judge this? Yes, pinch the loose fabric on either side and if you have about half an inch on either side, you and your shirt are good. If you have much more than that, it’s too large for you.
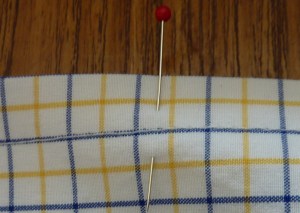
The shirt used in this example is clearly very large in the body, and also a bit large on the shoulders. The former we’ll take a crack at now, but the latter would take more work to fix, so we’ll leave it. This is actually a really good shirt to use as an example, as the pattern is almost like graphing paper, making it super-easy to count squares to make the darts the same, and also very nice to ensure they are straight.
A shirt that is the wrong size leaves you with a couple of options. If it’s too small, you can either lose weight, or give it to a smaller friend. If it’s too large you can either gain weight (beer, sugar and carbs will aid you in this quest), give it to a friend of greater girt, or… you can tailor it. And tailoring it isn’t actually all that difficult to do. To tailor a shirt you add darts to the front and back, one on either side, so four in all.
Theres probably no end of other sites showing this, but they’re girlie sites and around here we do things in a manly way. Right? So I’ll describe the process using the ancient way of using descriptive text and photos and we’ll have none of that running off to watch YouTube malarkey.
So, start out by finding a shirt that is a bit large in the body. Turn it inside out and call a friend to help you with the next bit, as it involves pins and you don’t want to have an accident. You can do it on your own, but it’s easier with help. Now, the excess fabric is to be taken in by adding the darts, and there is a certain sartorial elegance to be gained if you manage to distribute the excess in equal amounts between the four darts.
The dart should start about 1/3 of the way down from the shoulder, go from zero to full width in about 5cm, then continue like that to the lower edge of the shirt. Have your assistant put pins in to hold the trial darts in place, check how it feels, if the excess fabric has been taken in a bit. Adjust if necessary.
Then take the shirt off, carefully, lay it down on a flat surface and compare the darts. Adjust position and width to ensure they are as good as they can be. At this point a measuring tape or a ruler is your friend, you’re not losing manliness points if you decide to trust science over your eyesight and judgement.
Once you have the darts pinned, get the iron out. Yes, the one you iron your own shirts with. Iron the darts to get a nice crisp edge. Then assemble the sewing machine, select threads of a colour compatible with the colours of your shirt and get ready to sew.
If you’re uncertain about using a sewing machine, ask the person that normally uses it for guidance. The job we’re doing here now is not at all tricky, and good practice for your upcoming waistcoat projects. See how I’m helping you become a more complete and skilful chap? With the sewing machine all set up, you just need to run a seam down each dart, making sure to fasten the thread at each end.
Remove the pins, snip off the excess thread, and try it on. Now, how does it fit? Superbly or just a bit better?
The darts I put into this were 1cm wide, so with each dart removing 2cm from the body, a total of 8cm was removed, or hidden if you like. This makes a big difference to the shirt! Note, the darts can be quite easily removed and ironed out if the shirt needs to go back to a larger size at some point.
Suits you sir!


Great post we all have thrifted a great short that is too big but now it can be made smaller with ease!
Happy to be of help!
Indeed Ralph Lauren shirts are guilty of never have been cut properly for the European male!
[…] Re-fitting your shirt made easy […]